Tuesday 24 June 2014

Rajasthani Gatte ki Sabzii...

Helloooo Friends....

At First , I am soo sorry for not posting all these days.. I was not well , so was unable to post.  Lets comeback to regular routine from today but to honest , will post simple for a few days , as going through recovery....

Today we will cook , Gatte ki Sabzi... Completely Rajasthani Taste...   You would really love it... As it is simple to cook.. and different in taste , really with the regular taste..

So, Lets start with the ingredients , for Gatte and Gravy...

Ingredients : 

For Gatte

Gram Flour/Besan : 200 gms 
Kasuri Methi : 1/2 Teaspoon
Red Chilly Powder : 1 Teaspoon
Turmeric Powder : 1/4 Teaspoon
Carom seeds / Ajwain : 1/4 Teaspoon
Oil : 2 Tablespoons (To fry Gatte , its optional but really taste good if fried)
Salt to Taste

For Gravy 

Curd : 150 gms 
Tomatoes : 2 Medium sized ( You can add onion for taste , but I don't prefer them in this preparations)
Ginger/Garlic/Chillies paste : 2 Tablespoons
Red Chilly Powder : 1 and a 1/2 Teaspoon
Coriander Powder : 1 Teaspoon
Turmeric Powder : 1/2 Teaspoon
Cumin Seeds/ Jeera : 1 Teaspoon
Asofetidia /Hing : 1/4 Teaspoon
Ghee : 2 Tablespoons 

Freshly Chopped Coriander Leaves for Garnishing.

Procedure :

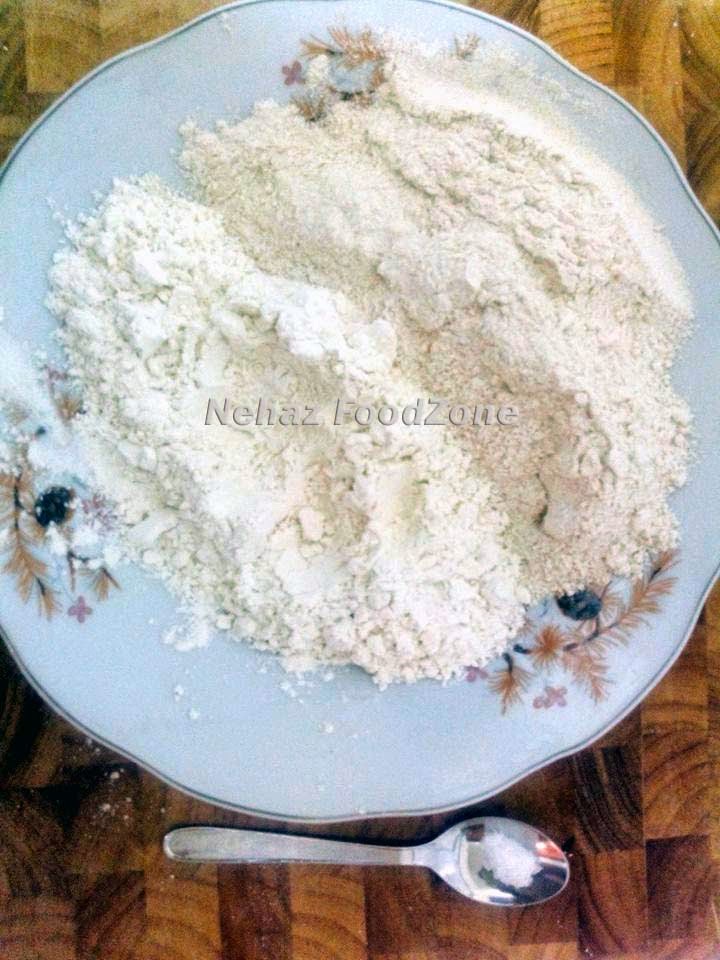
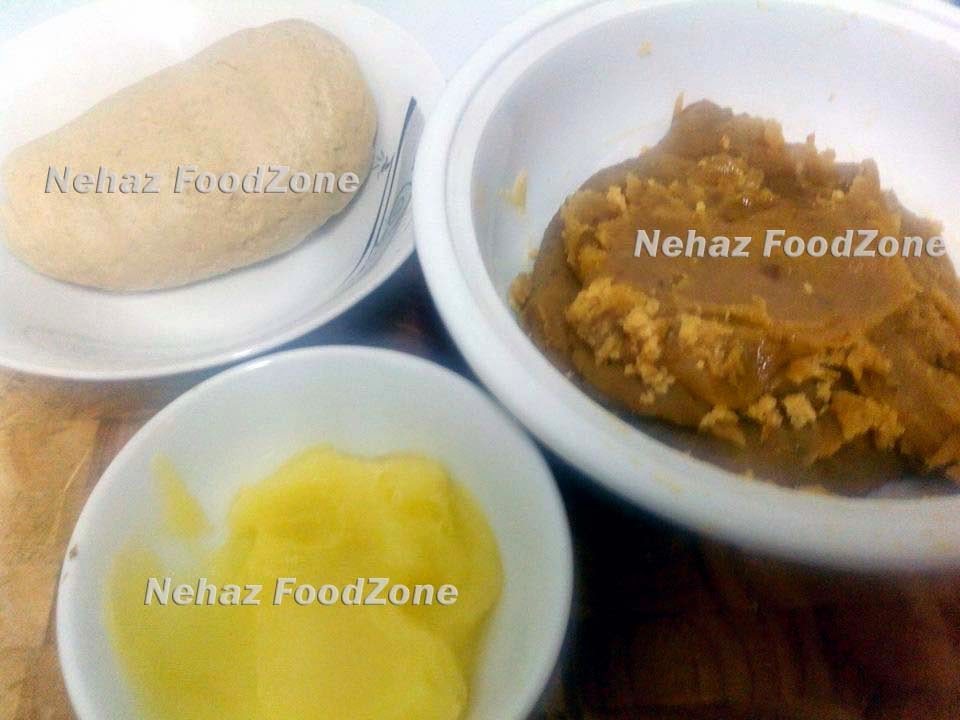
Firstly , Prepare gatte in a large bowl by mixing besan with all other dry ingredients properly. Now , sprinkle water and knead a firm dough. Add few drops of oil and knead again. Shape the dough into 1/2 inch diameter roll.

Add 3-4 cups of water in a wok/pan and bring it to boil for 2-3 minutes. Now , add salt and gatte rolls in the boiling water for 15-20 minutes on a high flame. (You can also add your tomatoes in this water for a thick paste to save time or seperately boil tomatoes)

After 15-20 minutes , keep the wok aside of heat and carefully bring out the rolls out of from the water , let it cool down for few minutes. Till that time add a kadhai , add oil in it and heat it on medium flame. Now cut the gatte into 1/4 inch slices. Fry these slices in oil , for crispy and fully cooked gatte (But , it is optional).

Lets move ahead with the Gravy now , Heat wok/kadhai on sim, add 2 Tablespoons of Ghee. Side by side  Boil the tomatoes and grind them in paste. Now , increase the flame to medium , add hing and jeera to the ghee. 
Add Ginger/Garlic/Chilly Paste in the ghee. Sauté till golden in colour , add tomato puree and let it boil for few minutes. 

Till it is boiling , take curd and dry spices in a bowl , mix and then beat them up properly either with a egg beater or fork. Beat the Curd/Daahi for few minutes and then add it in the boiling gravy.

Add the gatte when you see oil/ghee on the gravy. Let it boil for 12-15 minutes on low flame (Till you see Ghee/Oil on the sides of the gravy).
Once done , keep it aside from heat and garnish with coriander leaves.

Serve hot with hot Phulkas or Rice... 


Keep checking the blog for more and more new recipes :) You can check the updates about the blog and you can also post your queries on the facebook page https://www.facebook.com/nehazfoodzone

Hope to catch up with you tomorrow :( due to my health issue. So, Please co-operate my dear friends .... 


Wednesday 18 June 2014

Pooran Poli.... Fun filled stuffed chapati with lots and lots of desi gheeeee :)

Friendz....

Today I'm sharing one of my Favourite Marathi Dishh.... "Pooran Poli" ... I remember it when mumma is to prepare it on special occasions... Ohh god... they were so yummy dipped in ghee... but honestly I realised how tasty they were when I went away from my home :( and I missed them soo soo badly....

But one very important thing about this dish (If you really really wanna enjoy and relish it) just forget about dieting and calories chapter completelye while preparing and having it.... 

You don't need many things for preparing it but it is a tuff job in the sense of proportions , so be careful with them. Use the same cup / katori / glass for the measurement of all the ingredients(Chana Daal , Sugar ,Water) in entire recipe. Along with this please be careful with the hot pooran drops popping out of the kadhai, so save your hands and face with the pop-ups... 

So now, lets start with first making the pooran.. Then we will knead the dough for the crisp cover. This measurement will make 5-6 medium sized pooran polis.....


Ingredients :

For Pooran 
Chana Daal : 1 Cup (Soaked for about 1 and 1/2 hours)
Sugar : 1 Cup ( Please keep the same cup for daal and sugar(size))
Elaichi Powder: 1 Teaspoon
Nutmeg/Jaiphal : 1/4-1/2 Teaspoon paste ( Scrub it with few drops of milk on a stone hard surface)
Ghee- 100-200gms ( As per ur wish for consumption :P )


Pooran Ingridients

Daal Paste for pooran. Check the Cup in-between , I used it for my measurements.


For Poli (Crisp Cover)

Maida : 1 Cup 
Atta : 1 Cup ( Please keep the same cup for both maida                                                                       and atta (1:1))
Salt : 1/4 Teaspoon


Procedure :
For Poli : Take maida , atta and salt in a big bowl. Knead it in a soft and non-sticky dough.

For Pooran : At first boil the chana daal with 1 and a half cup of water (not more than that please , same cup ). Take 2-3 whistle and remove cooker of the heat. Keep it cool for sometime. All possible images are enacted to ease your efforts to some extent. Please check the very first picture of this post. It is having the image of boiled daal. (Your daal should be boiled the same way, all grains neatly visible and not mashed) 


Grind the daal in smooth paste in a mixer grinder. (Check the 2nd Picture for the daal paste , your paste should be the same). 


Now , Take a wok/kadhai keep it to heat on medium flame for 2 minutes and add sugar and the chana daal paste. 


Keep stirring with a spatula (prefer one with long handle) for approx 5-6 minutes and it will be identical to below picture. 


You have to stir it it gets thick but it will take atleast 1/2 hr to 45 minutes. But time can be decreased to few minutes non-stick wok/kadhai is used. You can rest your hand for few seconds without stirring and add the elaichi powder and jaiphal paste. You can stop stirring only when it is in liquid form but as soon as it gets thicker and thicker , please don not stop your hand...
(Warna gadbad ho jaegi :( ) 

Now when you will see that the pooran sticking on the edges of your vessel and drying up quickly simmer the gas. It is the time when you can relax a bit. Add 2-3 Teaspoons of ghee and mix it well , it will be completely soaked by pooran in a few minutes. 


Just place 2 of your fingers on the pooran and check whether it is sticking to your hands. If not your Pooran is ready.. If it is still sticking (which is very rarely after following the exact procedure) continue to stir for 3-5 minutes more on simmer gas. Then repeat the finger test. 


Now , when the Pooran is ready and the dough is kneaded we need only these things .


This is the time to take the your roller (Belan) in hand. Dust some maida on the board (chakla) and make a balls out of the dough , press it to make a small puri. Stuff a ball of pooran in it and join all the ends.


Press it , roll it in maida and make a 1/2 mm thick stuff chapati out of it.


Now , put it on a semi hot tawa. Do it same way as you do for a stuff parathan butin place of oil , apply desi ghee on both sides and fry till golden brown spots. Enjoy the hot pooran drippling poli's with a lump of ghee agaainn.....


Enjoy and keep checking the blog. You can even check the updates and easily share your feedback and queries at NehazFoodZone


Tuesday 17 June 2014

Chole Bhature....

Hellloooo My dear Friendz.....

Today we will make Chole Bhature... "Ekdum hotel style.. ek bar khaoge toh khate reh jaoge." This is a recipe which you would really love and relish. Once you make it for your family , and they would ask you to make it again and again....

Make it exactly the same way... Here, we will make 3 things : Chole , Bhature and Fried Masala Mirchi.  So Lets start , At first we will move ahead with the ingredients. It will easily serve 3-4 persons with an average diet. 


Ingredients :

For Bhature :
Maida : 200gms
Suji/Rawa : 50gms
Salt : 1 Teaspoon
Curd/Dahi : 2 Tablespoon
Oil : 1). To cover the kneaded dough (Few Drops)
       2). To Fry Bhature


For Chole :
Chole : Soaked for 4-5 hours and Boiled with salt, garam masala and 2-3 Tea bags or Chaii Patti ki potli. (see picture)
Masala : Roasted Ajwain , Methi Dana , Anardana and Jeera powder (grinded in mixer)
Onion : 1 Medium Size ( Chopped Lengthwise) 
Tomatoes : 2-3 Medium Sized boiled and grinded it in paste
Ginger/Garlic/Chillies Paste : 2 Tablespoons
Cinnamon Stick : 2-3 Inches
Badi Elaichi : 1
Tez Patta : 1
Tumeric Powder : 1 Teaspoon
Chilly Powder : 2 Teaspoons
Dhaniya Powder : 1 and 1/2 Teaspoon
Garam Masala : 1 Teaspoon
Chole Masala : 1 Teaspoon
Salt : 1-2 Teaspoons (Do not forget that we added salt during boiling of chole, and we will add the same water)
Oil : 2-3 Tablespoons
Coriander Leaves : 1 Tablespoon Chopped for Garnish... 


For Fried Masala Mirchi :
Green Chillies : 8-10 (Atleast 2 Per Person)
Chaat Masala : 1/2 Teaspoon
Salt : 1/2 Teaspoon
Red Chilly Powder : 1/4 Teaspoon
Lemon Juice : 1 Teaspoon

Procedure :

To knead the dough : Take maida , suji , salt and daahi in a bowl. Mix all the ingredients well with your hand or spoon as per your wish. Now add some warm water. Please add only little water at a time or the dough will be very loose and sticky. So be careful. As it is daahi will moist the maida/suji a bit.
Knead the dough soft , keep punching it for 5-7  minutes. The apply few drops of oil and cover with a slightly wet cotton cloth for 1-2 hrs.


After about 2 hrs , punch the dough for 2-3 minutes. Make balls with the dough and make medium sized puris/bhaturer with the help of few drops of oil. Heat the oil in kadhai and deep fry the bhature till creamy pink colour. 

For Chole : At first , add Oil in the Wok/Kadhai , once it is heated add Dalchini , Badi elaichi and Tez Patta. Now , Add the 1 Teaspoon of the roasted masala and garam masala. Fry till the fragrance spreads. (Approx for a minute). Please make sure you keep the gas flame on slow or medium and never on high. Once the masala is done , add ginger/garlic/chilly paste. Sauté the paste until golden brown. 

Now its time to add the onion , salt and fry till slightly golden. Add Chole Masala , Chilly Powder , Coriander Powder , Tumeric Powder and Garam Masala. Saute for a minute , add 1/2 cup of water and saute for 1-2 minutes. Now add the tomato paste and keep sautéing. Once you see oil droplets over the gravy , add some water , sauté it for few more minutes.

It is time to add the boil chole (do remove the potli , it was only for use during boiling) without the boiled water (but keep the water do not throw it). Fry the boiled chole with the gravy do mash few chole with the masher or spatula and saute for a minute or 2. Now add the water (boiled chole) and bring it boil for sometime on slow flame covered with lid for 10-12 minutes. 

Once in a while , do stir it in between. You will be able to see oil over the gravy , it is time to remove it from heat. Garnish with coriander.

For Fried Masala Mirchi : Slit green chillies horizontally. Mix the spices with lemon juice and fill it will each chilly inside with a knife. Now add 3-4 drops of oil in a pan and fry for 1-2 minutes. Till you gets small black spots on each chilly.

Keep checking for more such yummy and tempting recipes on the blog. Tomorrow we will meet wid Pooran Poli.. it is a fun filled sweet chapati served with lots and lots of ghee :).... 

Monday 16 June 2014

Crispy Spicy Chana Kabab ....

Hey Friends,

Today we will make , Chana Kabab.. They taste really good... You would definitely love them a lot , especially in starters... Serve them hot with pudhine ki chutney and onion wedges.... A bit Spicyy with a crispy cover and soft inside... You can also have it as an evening snack with tea... So lets start with the recipe first , then we will decide when to eat :/


Ingredients :

Boiled Potatoes : 3-4 (Medium Sized)
Black Chana : 200gms (Soaked for 4-5 hours , Boiled with salt and garam masala)
Gram Flour/Besan : 2-3 Tablespoons
Ginger : 2 inch approx
Chillies : 3-4
Lemon Juice : 1 Teaspoon (sorry :( forgot to keep it in picture below :( )
Chaat Masala : 1 Teaspoon
Cumin Seeds/Jeera : 1 Teaspoon
Coriander Powder : 1/2 Teaspoon
Red Chillies Powder : 1 Teaspoon ( U can make them a bit spicy, they taste really good when hotttt)
Tumeric Powder : 1/2 Teaspoon
Salt : 2 Teaspoon (or as per your taste)


 Procedure :

At first , grate the boiled potatoes. Now , coarsely grind chillies , ginger and salt and lemon juice in mixer. Add the boiled chana and few drops of water in the ginger chilly paste and grind it. Please do not add to much water in it. Now take out the mixture and mix it with grated potato. Add the spices and besan/gram flour.


Make sure it is not very loose/sticky/wet. We are adding the gram flour for making it smooth  and bind-able. Apply few drop of oil if it is too sticky(by chance). Mix it , knead it well and start forming tikkis/kababs out of the mix.


Now it is absolutely your choice whether you want it deep fry or shallow fry. But here I did deep fry for the first 2-3 minutes then on getting the cover slightly golden in colour putting it on hot tawa and frying it without any oil till it gets crispier with a golden brown colour and somewhat hard cover.
So friends , it completely up to you. You can also keep a small piece of cheese or a small ball of grated cheese if you are a cheese lover :)


Enjoy the Kababs with mint chutney and drinks ... Cheerssss.... :) :) :)
Do keep checking the blog for many more recipes like Chole bhature , Eggy Breads , Mutton Biryani , Malai Kofte , Puran Poli , Bharle Vangge (Bharwa Baigan)... and More n More :) :) :)

Sunday 15 June 2014

Tutty Fruity.... :)

Hi ...

Tutty Fruity is nothing but the small colourful cubes we generally come across when we have sweet dishes. Actually , Tutty fruity has multiple culinary uses, mainly in confectionery and bakery industry. Especially , in biscuits, cookies, cakes, pastry , ice creams, custards, soufflés and even pies....

Kids generally get fascinated with this sweet , colourful candied fruit cubes. In my childhood days , I always wanted to know how is it made then one day I came across its recipe and I made it. It was exactly the same as we get it market and I was so delighted. Since then I keep making it , eating it and adding in my dishes to make them look representable and tempting.

Tutty fruity is made up of raw papaya. It is a long procedure due to which many people avoid to prepare it but just try once you ultimately get a wonderful output. It can be preserved for long-term use if stored in a refrigerator in an air-tight container. Lets start with the procedure. 


Ingredients :
Raw Papaya : 400-500 gms
Sugar : 2 cups 
Water : 2 and 1/2 cups
Edible Colours : As per your wish
Vanilla essence : Few drops

At First , I will show you how much raw the papaya should be , so that it serves our purpose.


Peel the papaya and cut it in small cubes. 


 Once the cutting part is done , Boil the papaya cubes for 3-5 minutes in a tea-pan.


On the other hand, take a big wok/kadhai and add the sugar & water in it. The timing will be perfect if you keep a watch for the cubes boiling and sugar dissolving in the water. 


Once the sugar is dissolved in water , add the boiled cubes. 


Let the papaya cubes boil in the sugar syrup till the time the sugar syrup/chashni has turned to "One Tar". It will take about 20-25 mins approximately on a medium gas. And make sure you are stirring it in-between.Keep checking the chahsni, by taking a hot drop of it in between your index finger and your thumb (please be very very careful). When you open the finger and see one spyke of chashni stretched atleast till 1 cm , Then it is ready...
Now, you can put the wok away from heat and add vanilla essence in it.


Leave it to cool for 1 hr or so. Now you can add colour in it. Divide it wisely , if you want it to be of multiple colours like Red, Yellow , Orange , Green etc.
After adding colour , leave it soaked in sugar syrup for 24-36 hours.


Now , With the help of a Strainer/Channi , remove the chasni , make it dry by keeping it in a strainer and letting the syrup strain out completely by making the cubes moist but non-sticky.


You can now happily store the multi-coloured cubes in an air tight container and keep it in fridge so that can be used as an when required. 


Enjoy the recipe my dear friends.. Now, You can queries related to the recipes on facebook page https://www.facebook.com/nehazfoodzone?ref=hl... Keep checking the blog for more yummy fascinating recipes and cookery tips.


Saturday 14 June 2014

Pizzzaaaa....

Mama Miaaa... Its Pizza day today... Come on everyone.. Lets make a delicious veg cheese pizza with a home-made base in the oven drippling over hot cheese and a taste a soft veggies with a glass of coke and Hot and sweet tomato ketchup... yummmmieee...

So now , lets start , with the ingredients but we will keep it very simple this time as in pizza you can make a change in your toppings as per your wish...

Ingredients : (For one small size pizza)

For the Base 

Maida : 1 Cup (100-150gms)
Yeast : 1 Teaspoon
Sugar : 3/4 Teaspoon
Salt : 1 Teaspoon
Curd : 2 Teaspoons
Oil : 1 Tablespoon
Warm water : 3/4 Cup (to Knead the dough)

At First we will knead the dough and keep it in a warm place for about 4-5 hours for chrunchy munchy base. Actually , Softness of the pizza depends on the consistency of the kneaded dough. If you want a soft pizza knead the dough a bit wetty and for a crispier dough knead it less soft (similar to the way we knead a puri dough).

Take some luke warm water, add the active dry yeast and sugar . Keep it aside for 10-15 mins. Now , till this time , Take maida , salt and curd and few drops of oil mix them properly. After about 10-15 mins you will be able to see a creamy white layer on the solution of sugar /yeast/water. Mix it properly with a spoon so that all the granules of yeast and sugar are completely dissolved in water  Now knead a soft dough with this water. Add some more water if you want. 

Keep kneading and punching the dough for about 8-10 mins till it is turned into a soft , white , spongy lump. Now apply some oil on the lumpy bumpy from all sides , cover it with a polythene sheet and keep it in a warm place.
After about 2 hours , check the dough , it would have grown in almost double the size you have kept. Punch it for about 4-5 minutes. 

Again wrap it the same way by applying few drops for oil and keep it again in a warm place. Repeat this procedure twice but now for 40 mins or so.


Now we will check for the ingredients for topping

For the topping :

Onion 1 Small: Chopped in tiny cubes
Tomato 1/2 Small : Chopped in tiny cubes
Capsicum Small Piece : Chopped in tiny cubes
Green/Red Chillies : Chopped in tiny pieces
Olives 2-3 : Chopped in tiny cubes
Corn : 15-20 pods
Cheese : Grated (2-3 cubes)
Tomato Ketchup : 3 Teaspoons
Butter : 8-10 gms ( a small chunk)
Salt as per taste


So , now after around 5 hours of your base sleeping sound in a warm place :) wake him up.. I mean .. Bring it out on the oven tray .. Sprinkle some maida on the tray and punch the base a bit. Now spread it from all sides , of about 7-8 mm of thickness with the ends turned up a bit. Wait , I will show you a picture below so that to make it clear. And yes , one more thing by the time you are arranging the toppings, preheat the oven at 110 degrees/ 6 gas mark.


It is time to spread you topping on the base. First layer should be of tomato ketchup , then sprinkle some salt and then add a layer of grated cheese. Now add few cubes of onion , tomato , green/red chillies , olives , capsicum , corn etc. Cover the base completely but make sure you don't overload the base. Sprinkle some salt and butter pieces/ drops over the topping. 

Now , its time to add my favourite layer .... The cheesy wheesy layer. Add the Grated cheese all over the base. Keep the pizza in oven for 10-12 mins and check. The time may differ a bit as per your oven. 


But guyz make sure you keep an eye on the oven constantly after 7-8 minutes, the moment you see browning of the ends of base and layer of cheese. Do check the base by poking a knife or fork in the side of the base.


If you feel it is perfectly done as per your oven. Bring the pizza out of the oven , bring out in a plate and serve it with cold drinks and ketchup....  


Enjoy a home-made pizza with your favourite movie or TV show. I will also post pizza on tawa soon but in that base will be ready made (bought from shop). It will be mainly for my non-oven holder friends :) or when there is no electricity and your lil kid is having strong urge to eat PIZZA..... 

Keep checking the blog for more yummilicious recipes.....    


Wednesday 11 June 2014

Emerald Thunder .......

Emerald Thunder is Simply Mint Flavoured Keri Panha which can be soother for all of you till your insides when you come home after a hard day in sun.... I Know that there are so many places in India where the temperature is boosting up to 46 Degrees. 

I am sure this drink "Emerald Thunder" when served flooded with lots and lots of ice will not only give you pleasure from outer heat but will also sooth you till the inside. I will be telling you this Mint Flavoured Keri Panha concentrate which you can dilute and use as and when required. 

Emerald Thunder will be thick in consistency just like jam and easily storable in fridge. You can dilute 2-3 teaspoon of jam in cold water , mix well and serve with ice.

Ingredients 

Raw Mangoes / Keri : 1/2 kg Boiled (Aprrox 3-4 medium sized)
Sugar : 250gms
Jaggery :200gms (approximately)
Black Salt/Kala Namak : 2 Teaspoons
Cumin Seeds Powder/ Jeera Powder : 2 Teaspoons (Raw jeera powder not the roasted one)
Mint Leaves/Pudhina Puree: 200 gms pudhina grinded in mixer
Green Edible colour : 1 pinch (Optinal)

Procedure 

Take out the pulp of raw mangoes with adding too much water. Now take this pulp , sugar and jaggery in a wok and heat it on medium flame. Mix the ingredients properly and keep stirrimg until the sugar and jaggery is completely dissolved. 

Keep stirring it for 15-20 mins . After some time of this similar process you will get a thick jam like substance with a glossy look. Remove the wok from heat and let it cool. Till the time it is cooling , take the pudhina leaves , grind them in mixer into a fine paste.

When the pulpy jam is cooled add kala namak , jeera powder , edible colour and the mint leaves paste/puree. Stir and mix the entire mixture properly.
Now, once everything is mixed properly , store it in a glass bottle and cover the lid.

Make sure water droplets or moisture should not enter the bottle by means of wet spoon or wet hands. Or else the jim jam jammy will be spoiled and could not be preserved till long. If taken care properly we can use it for approx 35-40 days.

You can use this jimmy jammy to make a fabulous drink by adding 2-3 teaspoon in a glass of water , mix well and add lots of ice. :) :) :)


Enjoy Emerald Thunder this way and do share your feedback either here or on our facebook page "Nehaz FoodZone"  :)

Tuesday 10 June 2014

Chatpati Chana Chaat .....

Good Evening Everyone.....

Today.. We will make a recipe , which can be included in in your food anytime. May it be breakfast , brunch , evening snack or even starters. You just need to adjust the spices a bit according to morning or evening time of the day.

So lets start with the recipe ,

Ingredients :

Chickpea (Black)/ Kale chane : 200gms (Soaked for 5-6 hours)
Onion : 1 Medium sized (Finely chopped)
Ginger/Garlic Paste : 1 Teaspoon
Tomatoes : 1 Medium Sized (Finely chopped)
Green Chillies : 2-3 (Finely chopped)
Coriander leaves : 2 Tablespoon (Finely chopped)
Brown Mustard seeds / Rai : Few seeds
Asafetida/ Hing : 1 pinch
Red Chilly Powder : 1 Teasrpoon
Tumeric Powder : 1/2 Teaspoon
Dhaniya Powder : 3/4 Teaspoon
Chaat Masala : 1/2 Teaspoon
Garam Masala : 1/4 Teaspoon
Salt as per taste.
Oil : 1 tablespoon

For Garnish :
Chopped Coriander and Lemon wedges.Onion, Tomatoes and Green Chillies (half of the above we kept after tadka).

Procedure :

Heat Oil in pressure cooker and use rai and hing for tempering. Now, add ginger/garlic paste , sauté for a minute and then add half of the onion chopped. Its time to add some salt and sauté till the onion is golden in colour. Now add half the chopped tomatoes and green chillies. 

Sauté for 2-3 minutes and add the other spices. Add some water , sauté for another minute and add the black chane without water (sprinkle some water) and cover the lid for a minute. Now add approx 3 cups of water and put the lid of the pressure cooker on medium gas flame.

After two full whistles and store the steam for one whistle and keep the lid closed for 5-7 minutes. Hopefully when you open the gas after this time, all the chane would be cooked properly. Still mash one chana and check. If by chance it is not cooked properly , add half cups of water and cover the cooker lid once more.

This situation may arise mainly due to 2 reasons , first , quality of chana and second the soaking time. 

Once it is cooked properly , Take out the dry chana masala in serving dish and sprinkle with chopped onion , tomatoes , green chillies. Add lemon juice , and enjoy the snack.

U can also have Kale chane by just boiling them with salt and a pinch of garam masala. then add chopped onion , tomatoes , green chillies , salt , lemon juice and enjoy it in breakfast or anytime when you are hungry and want to eat something quick and healthy.


Keep checking this blog for many more yummy recipes for your tummy and easy kitchen & cooking tips. This Blog is updated daily with a variety of recipes.

Tomorrow we will catch up together to prepare a minty cooler with some raw mangoes , to sooth you till the soul. You can even preserve it in your fridge so that you can quickly come and have it after a bad day in sun.


Monday 9 June 2014

Gulaab Jamun :)

Hello...

Today we will have spongy,  soft milky balls soaked in warm rosewater scented sugar syrup. Gulaab Jamun is a Traditional Sweet Dish which is round in shape , brown in color and instantly melts in your mouth giving you immense pleasure. This is made up of mainly khoya / mawa. Frying these balls can be termed as the most difficult task. Flame should be sufficiently low so that the gulaab jamuns are cooked till inside.

Ingredients :

For the Balls -

Khoya/Mawa : 250gms (If Homemade mawa should be of skimmed milk)
Paneer : 25 gms
Maida : 25 gms (Approx 2-3 heaped teaspoon)
Sugar Candy / Mishri : To Stuff the khoya balls (its optional)
Milk : To knead the dough
Almonds/Pistachios : For Garnishing
Ghee : To deep fry

For the Syrup -

Sugar : 2 Cups
Water : 2 Cups
Cardamom Powder : 1/4th teaspoon
                    Or
Edible Rose Water / Rose Essence : Few Drops

Procedure

For Balls : Mash the Khoya , Paneer and Maida with milk and knead into a soft dough. The dough should not be too wet nor too dry. Hence knead accordingly. It will turn soft, fluffy and non sticky if done regularly for few minutes. Cover the dough with a wet cloth for 15-20 mins.

For Syrup : In the meantime , Mix sugar and water in a large wok and keep it for boiling. When the syrup comes to a rolling boil , and then simmer for 3-4 minutes. Check it if is a 1/2 tar chashni. Once you check and confirm , add rose water or cardamom powder according to your wish. 

Now, Form small balls out of the dough and stuff 1-2 sugar candies in the balls. Take one sugar candy and stuff it in between each ball and make a smooth round ball without crack, but remember not to put much pressure when making the balls. The candies will melt while frying , leaving a hollow space with sweetness in your gulab jamun.

Once all the balls are formed , put them in ghee slowly and deep fry them with precaution. Add only 2-3 balls at a time in the wok as they will get a little bigger in size.

Fry in low or medium heat , until dark brown in colour. Keep rolling the balls from all sides so that they are cooked from all sides and angels. Take them off the flame once they are dark brown in colour and soak in sugar syrup. 

They will become slightly more big , spongy and softer in the syrup. Garnish with almonds and pistachios and serve with kulfi , ice-cream to enjoy these milky balls more. 

Hope you would relish it. :)


Sunday 8 June 2014

Coconut Fish Fry....

Hey...

So here comes the first non-veg dish on this blog :) Check it , Cook it the same way. And I am damn sure you will relish it. It is awesome. 

Ingredients :

1.Fish (Rohu) : 1/2 kg (This is the best one)
2.Coconut : 1/2 ( Dry or Wet both can work well , but wet one is preferred)
3.Garlic : 1/2 Cup (approx 15-20 cloves)
4.Ginger : 2 inch
5.Tamarind / Imly : 50 gms
6.Carom Seeds/ Ajwain : 1 Tablespoon
7.Red Chilly Powder : 2 Teaspoons
8.Turmeric Powder : 3/4 Teaspoon
9.Salt : 1 and 1/2 Teaspoon ( As per your taste)
10.Gram Flour / Besan : 100gms
11.Oil to Shallow fry fish ( According to your wok/kadhai/pan)
For Garnish
1. Freshly Chopped Coriander Leaves
For Plating 
Tomatoes , Onion , Cucumber and Lemon wedges

Procedure :

Clean the fish properly. Rub some gram flour on the fish cubes to get away with the typical fish smell. This rubbing of besan decreases the smell to 60-70% and as it is rohu fish does not spreads the smell.

So, now we will start with the procedure. Boil Tamarind in 2 cups of water and squeeze out the thick brown Imly pulp. Now , Add Coconut , Ginger , Garlic , Ajwain ,  Red Chilly Powder , Turmeric Powder and Salt with the Tamarind/Imly Pulp and grind thick paste in Mixer. Do not add water , this paste should be thick . Now , The Paste is ready. Put this Paste in a bowl and dip all the fish pieces in it. Let it marinate at room temperature for 30-45 Mins..


After 30-45 mins , Put Oil in a wok/kadhai , keep it on Medium flame. Drop a bit of paste in the oil to check whether it is properly heated or not. If oil is heated coat fish pieces in gram flour/besan from both sides and slowly put them in oil one by one (3-4 pieces at a time). Cover with lid for 5 minutes. Turn and sauté on medium flame until the masala is golden brown in colour. After 8-10 minutes, if you poke the piece with the spatula , You can see find perfect white fish piece for inside. This is the sign that it is cooked properly now. 

The outer masala will be some what dry in texture and golden brown in colour.
You will also be able to see excess oil coming out from the sides in the wok.
This cooking time for this fish is approximately 12-15 minutes on a medium or slow flame. Fry it from all sides properly for a better taste.


Serve hot and Enjoy this yummy fish fry and do let me know how was it. I really hope you would relish it.
Keep Checking the blog for more recipes and easy cooking tips. Blog is updated on daily basis. :)
Catch you guyz tomorrow with a sweet dish :)